Cobbler Cobbler – Focus on Rhythm for Kindergarten

I love the possibilities with the song/poem “Cobbler Cobbler.” It is incredibly versatile and perfect for K to 3 music instruction. My littles in kindergarten will be experiencing this classic over the next few days.

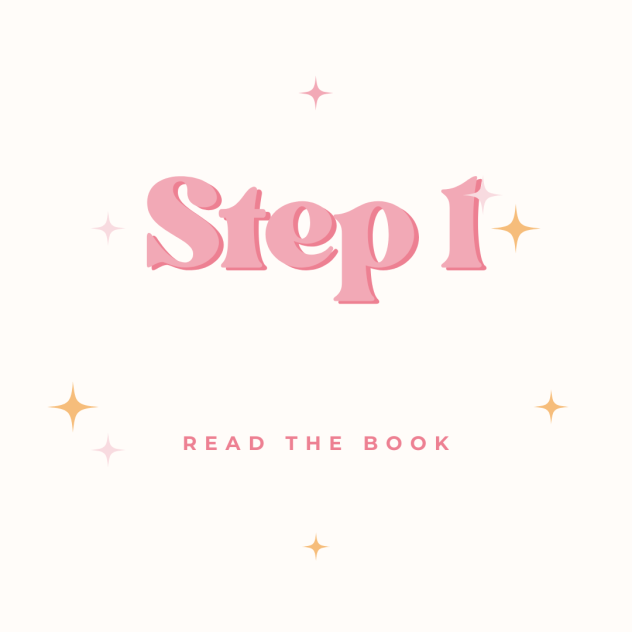
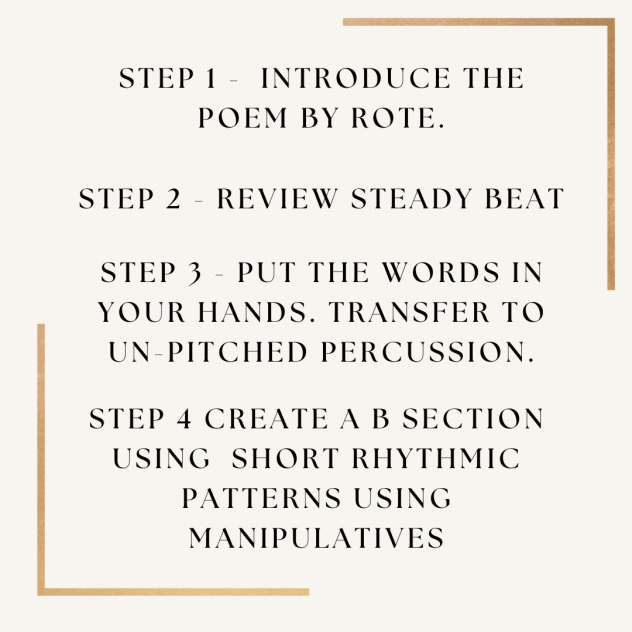
Step 1 Introduce the poem by rote.

Teaching by rote is the most efficient way to introduce a poem or song. Some pedagogues feel it takes away from learning to read music; however, at the K to 3 level, the rhythmic or melodic reading skills are more meaningful when students can connect it to prior knowledge—in this case, being able to sing the song accurately.

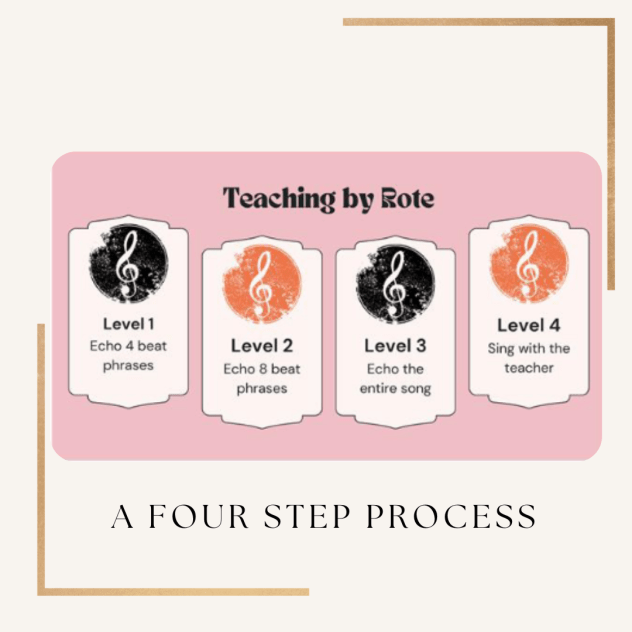
I use a four-step process when teaching by rote. The students understand the process and can define each level.

Level 1 – Begin with short phrases.

Level 2 – Listen Longer.

Level 3 – Listen to the entire song.

Level 4 – Sing with the teacher.

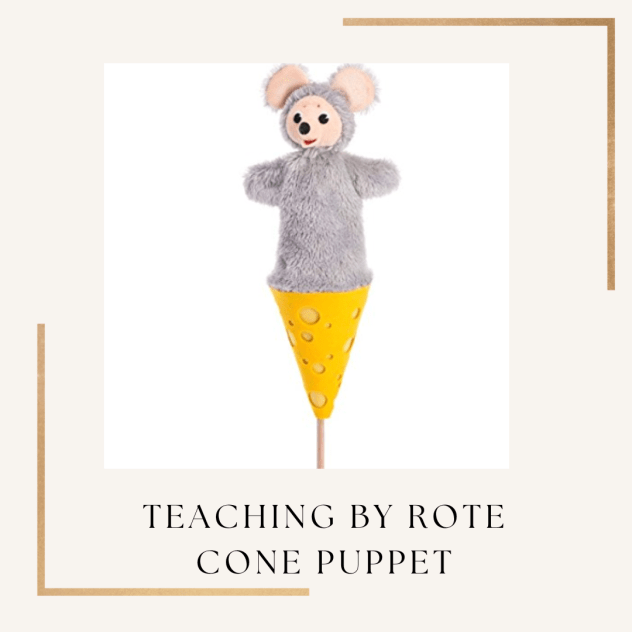
Does it drive you crazy when students sing when they are supposed to be listening? My cone puppet, “Westy,” the mouse, helps support proper echoing technique. Listen when the puppet is in the cone; when the puppet is out, sing. My students love it, and it is always in my hands when teaching a song or poem by rote.

Step 2 – Review steady beat

Understanding the difference between a steady beat and rhythm is a core concept that must be reinforced yearly. I use a simple definition. The steady beat stays the same, and the rhythm changes. Rhythm includes both short sounds, long sounds and silence. After learning the poem by rote, we feel the steady beat in our bodies. I begin by patting the steady beat. I ask the students: “Is this a steady beat, or is it rhythm? If they answer incorrectly, I ask, “Does it stay the same or change?”

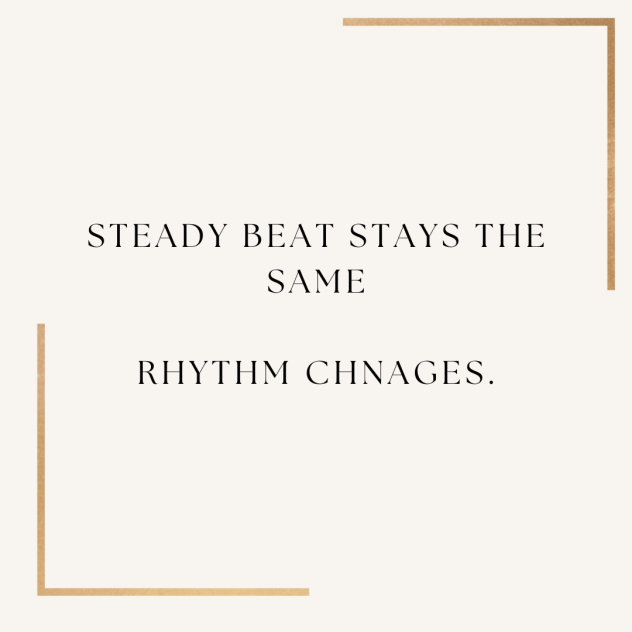
After re-defining the steady beat, I asked the students: “Where in our bodies can we keep the steady beat?” Using their suggestions, we feel it in different ways before transferring it to un-pitched percussion.

Step 3 – Put the words in your hands. Transfer to un-pitched percussion.

Rhythm = words in kindergarten music. Rhythm should connect to language. The kindergarten teachers love how I introduce this concept because it correlates to their work with syllables. Another link to the classroom is through audiation. Audiation is internalizing sound. When we think and clap the words, we develop the skill to read silently, process, and problem-solve internally.

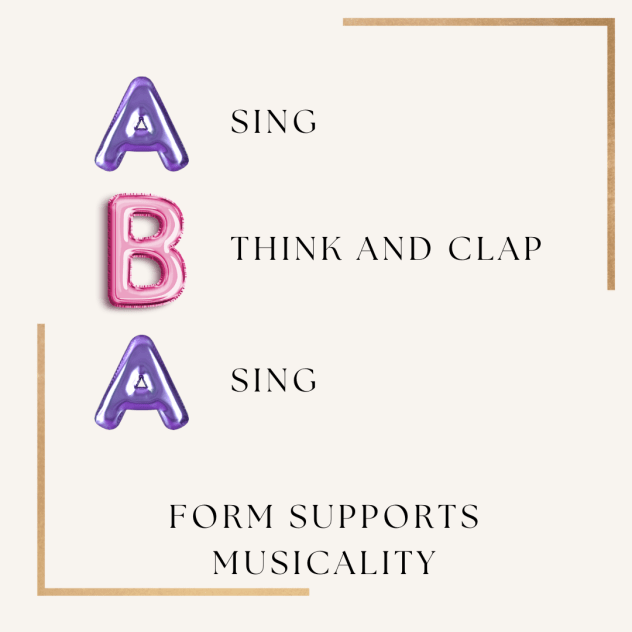
I use form to maintain the musical integrity and flow of the experience. The students will sing the song; Think and clap the rhythm; And then sing the song once again.

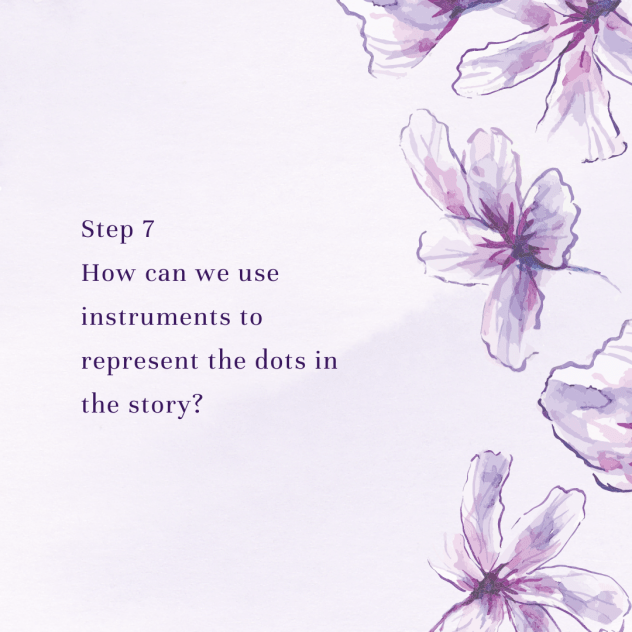
Properly understanding a concept is demonstrated when you can use prior knowledge in a new way. If you read my last post, I ask questions to support the Creative Process. How can we perform the rhythm in a new way? Students will offer suggestions like patting the rhythm, snapping the rhythm, and stomping the rhythm. I want to transfer it to instruments, so I have the instruments visible for inspiration.

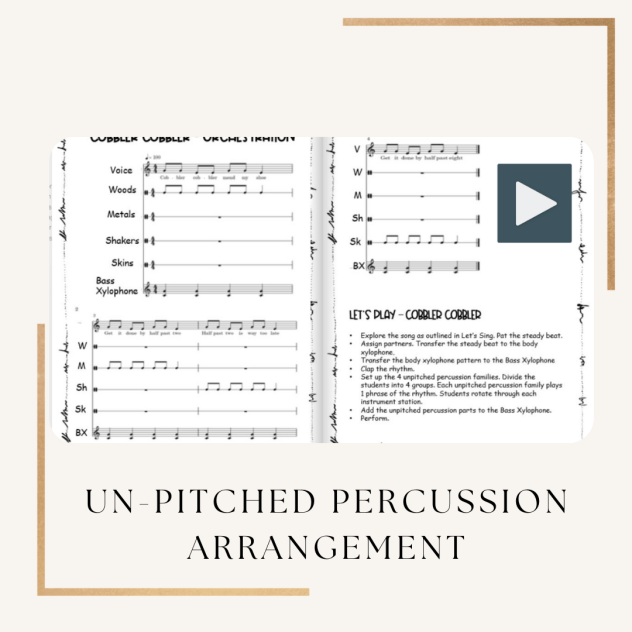
I had the different un-pitched percussion families playing individual phrases in this arrangement. Because it is the beginning of the year, I will have all the instruments play the rhythm together. Our form will now include: “Think and play” instead of ” Think and clap.” I will play the bordun to accompany the students to pull it all together. Orff arrangements are adaptable to fit the needs of your students.

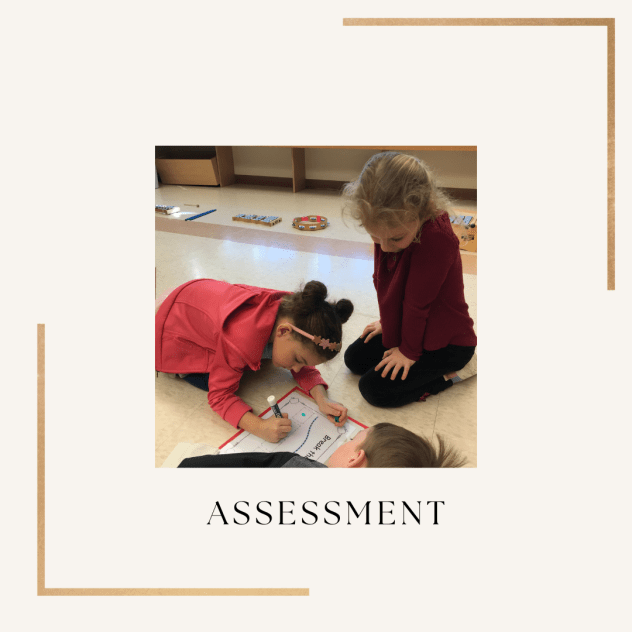
Step 4 Create a B section using  short rhythmic patterns using manipulatives

The students will work in small groups for this part of our lesson. Create a four-beat pattern using “cobbler” for two sounds and “shoe” for one sound.

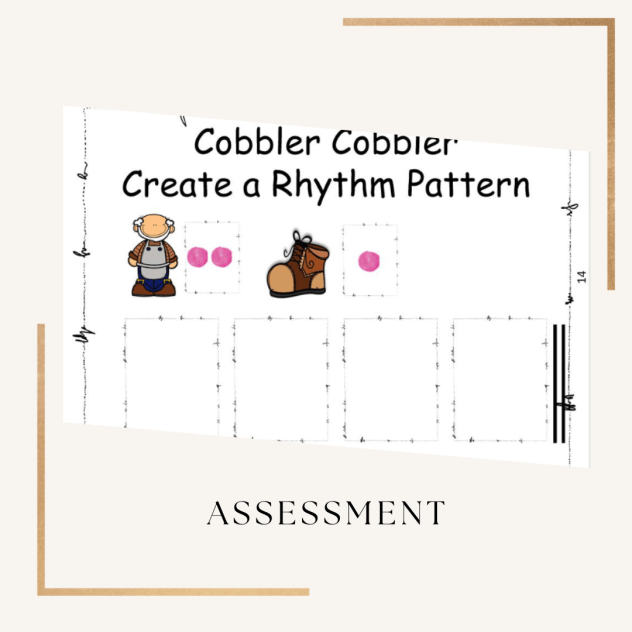
Before they begin this assessment activity, I model how to take turns and resolve conflict. I encourage students to maintain the form by singing the song as one student creates. As they play together, I circulate and assess whether they can accurately clap one sound and two sounds. The students don’t even know they are being evaluated.

To recap the process:

As always, I like to share with my community. Here is a link to my ‘Cobbler Cobbler – Focus on Rhythm” E-Book:

Have fun and let me know how it goes for you.

Take care

Ms. Syndi


Let’s Play – Supporting the Creative Process in Music Class

I’m back. It has been a while. Last year, I switched schools after teaching at Westwood Primary for ten years. Change is necessary for growth, but it was not an easy year. Less time was available for blogging and sharing, but I am hopeful to get back into it now that I am in year 2. Today, I am thinking aloud about using “Let’s Play” by Herve Tullet to support my students in making creative choices.

The Creative Process as a Pedagogy approach fits well with my Orff specialist background. You can Google the Creative Process and find multiple ways to follow the steps in your creativity, but how do we support students in their journey? It begins with questions.

I work with pre-service teachers as a sessional lecturer and mentor, and the first habit I have to break consistently is the teacher-centred, tell-the-kids-the-answer instinct in all young teachers. Yes, we do have to share knowledge and skills with our students, but sparking the students’ creative process by asking questions instead of telling them what to do makes the learning more profound and meaningful. Let’s work through the process with “Let’s Play!” We need to begin with an objective and an assessment statement for my kindergarten class. Keep in mind that your objective and assessment needs to match.

This year, I want to connect my lessons with books. As a veteran teacher, I challenge myself to try new things within the Orff umbrella each year. It drives my husband crazy that I don’t plug and play the same resources, but that would be boring!

This book is perfect for vocal exploration with the line pathways and dots. When I read it to the students, I follow the lines with my voice as I trace them and make vocal sounds for the dots. I model what I want them to choose to do with the book. You may consider this cheating, but I look at it as inspiration.

I ask students to share their favourite page but want them to follow up by discussing the art. I use questions to guide their noticing, beginning with broad questions and shaping them if needed.

Why did you like this page?
Did you like the lines?
What was unique about the lines on this page?
Did they go high and low or stay straight?
Did they wiggle?
Did you like the dots?
What was special about the dots?
Did you notice the different colours?

How could we perform this story musically?

With my kindergarten students, this question will stun them into silence. When no suggestions are available to work with, I use “Would” and “Could” questions to offer ideas. Remember, questions spark the Creative Process.

Could we follow the lines and dots with our voices?

Would it work if we all did this together?

The above steps will form the initial experience, finishing with the question: “What did we do with our voices today? Did we find higher places with our voices? Did we find lower places with our voice?” Now, the fun begins. To show true understanding, students must use what they have learned to create something new. Let’s start with sparking some movement ideas. Just like I inspired my students’ creativity with my first reading of the book, I will encourage their creative movement by having movement props in front of the room when they enter the classroom. With this book, I am leaning toward streamers or scarves, but you can use whatever you have.

If you are met with silence…

Could we use a movement prop?
Would scarves or streamers work?
Which one would you like to use?
How can we move when we are touching specific colours?
Can you show me how you will move for the lines? For the dots?

Making the connection: “Wow! Did you notice our movement matched what our voices were doing with the story?”

Day 2 is done. Most of my lessons are pulled over three days. The fluency of a class is essential, and doing too much or too little upsets the flow. You should revisit your process if you need more time to make your teaching point within the three-lesson time frame. The format of my lesson plans includes other activities to fill the 30 minutes.

I want the students to continue to represent the lines vocally so my question is specifically about the dots. To inspire the students, I have the four non-pitched percussion families out and visible. This story works well with pitched percussion as well, however, during the first few kindergarten classes, my focus is on non-pitched percussion.

What instrument family could we use for the yellow? red?blue?

Let’s check our assessment statements.

I can expand my vocal range by following a vocal pathway.

I can show my vocal pathway in a new way through movement and instrument playing technique.

We achieved our objectives since we can answer yes to these I can statements. I did not “tell” my students anything in the process. The more you use this approach, your students will begin to ask themselves these questions, and their creative choices will become more authentically theirs.

Let me know if this lesson works for you. Part of blogging is connecting with other music teachers. I love to hear your thoughts.

Take care,

Ms. Syndi