Star Light – A Pathway to Melodic Contour

I always love this little piece, so simple and sweet, great teaching potential!! And I have a funny story.

I was teaching a grade 1 class “Star Light”. I told them that if they sang with all of their heart, that the wish they made at the end just might come true. At that exact moment, an educational assistant entered the room and whispered to me that we were going to have an early closure because of a snow storm. We did our little “Star Light” and made our wish and I said “I wish we could go home early today.” The principal came on over the PA system and announced “All students return to your classes. We will be having an early closure today.” My class thought I was magical for the rest of the year!! BAHAHA.

Such a great memory.

The way I use “Star Light” has evolved over time. I use it as a pathway to melodic contour. Here is what I do with my K’s:

  • Intro the song by singing it with the Bass Xylophone accompanying.
  • Continue the accompaniment and echo each phrase. Sing through together.
  • Pass out the stars. Mirror the high/low contour with the stars. Students are still other than the melodic contour.
  • Students sing and show melodic contour independently with accompaniment.
  • Teacher plays melody on Bass Xylophone. Students take their stars for a gentle “star dance.” Back to their spots by the end of the melody.

Form

A   Song with high/low contour

B   Star Dance

A   Song with high/low contour

  • Transfer the high/low movement to their shoulders and hips for phrase 1 “Star Light, Star Bright”
  • Present the following visual (These are 4 separate stars)


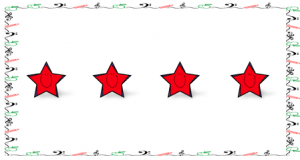
  • Through discovery, we shape the melody to look like this:

  • We use these little hand bells and play phrase 1.

https://empiremusic.ca/index.php?route=product/product&product_id=718&search=hand+bells

  • I accompany on the Bass Xylophone and they go to the end of the line like this:

I have added the visuals in a pdf for you on the page marked PDF’s so you can try this with your little ones. Let me know what you think.

Have a Wacky Wednesday,

Take care,

Syndi

Trick or Treat


Trick or Treat

Trick or Treat

Give me something good to eat

We played with the rhythm of candy today. I brought in enough Halloween candy that I had 5 stations of:

  • Coffee crisps, kit kats, aero bars, smarties
  • Bubble gum, Suckers, Tootsie rolls

I grouped my students in 4’s and gave each group a ball, a bell, and a tray of candy. 

My k’s and 1’s played as follows:

  • Say the poem and pass the ball around the circle.
  • Whoever has the ball at the end of the poem, rings the “doorbell” and takes a candy.
  • Student claps the candy.
  • The group echoes.
  • Game play continues.

Here are my little k’s playing:

My 2’s and 3’s played the game a little differently:

  • Say the poem and pass the ball around the circle.
  • Whoever has the ball at the end of the poem, rings the “doorbell” and takes 3 candies.
  • Student creates the pattern with the 3 candies and a rest.
  • The group echoes.
  • Game play continues.

This is what it looked like with the older kids.

This


This was lots of fun. I was able to get around to check on rhythm accuracy. A quick and easy peasy assessment. And the kids had a blast. It was a good Monday.

Till next time, have a Musical Monday,

Take care,

Syndi

A Halloween Soundscape – Exploring Timbre

Last week, I introduced my classes to soundscaping. (Yes, I made that word up) It definitely is an action verb in my book. We looked at the idiophones we had in our classroom – Sound effect instruments. They included:

 Windchimes – I tell the students to tickle them very gently. My chimes have a few missing “teeth” from rough handling. Let them taper naturally. There is no need to “stop” their sound.

Thundertube – This instrument is by far the most popular with my students. It really is a skin instrument (drum ) with a spring attached. I teach them to play it with the spring hanging down. I also tell them not to touch the spring. You shake it to begin the sound and let it dissipate naturally.

Ocean Drum – This is another skin instrument. This drum has little beads that roll around and create the sound of the ocean. I tell my kiddos that they hold it parallel to the floor. They roll the beads gently. The sound increases with more motion. I do show them how clunky it sounds if you move the beads too quickly. YUCK!!!!

Rainsticks – This is always a lovely addition to a soundscape. The gentle sound of the rain. Easy to play – tip them over and pour them out. (HAHAHA)

Ratchet – This is one loud instrument. A mechanic’s tool made into an instrument. Great for Halloween.

We only have a few of these special instruments so I also have maracas set out.

I gathered them at the board and shared these visuals: (There is a little work. You need to cut out the little cards.)


They added the little cards kinda like this:

I had them notice the dotted line – the most important part of our soundscape. We need something to “glue” our piece together. I showed them a broken bordun (E and B) on the Bass Xylophone or Bass Bars and I showed them how to do a tremolo. They picked which one they like and for the k’s and 1’s, I played it. For the 2’s and 3’s, I gave that role to a student.

They chose a sound effect instrument for each card

Chimes  RatchetThundertubeMaracas

This was one arrangement my K’s created. The bat is always maracas so everyone has something to play. Then I alternate the students through to at least one sound effect instrument.

The “Director” traces the pathway and the sounds enter as they reach the cards. They can start at the bottom or the top. They can move forward or backward. They can pause over a card if they want it to last longer. It really is open ended.

My students really enjoyed this exploration of timbre.

If you would like the visuals, visit my FaceBook page below and leave me a message. I will send them to you.

https://www.facebook.com/justorffinaround/?view_public_for=102708381151034

Have a soothing Sunday

Take care,

Syndi


Wee sing…Inspired! If I were a little Ghost

This little tune charmed me immediately and I started thinking about how we could make some ghost music. My K’s are ready to be introduced to the glockenspiel so I thought some improvisation in D pentatonic would work nicely! By the end of this part of my lesson I want my students to:

  • know the name of the glockenspiel
  • it creates a high sound
  • you can play 2 notes at the same time
  • Bounce off the centre of the keys

I chose for this intro activity to have the students play tone clusters. The bi-lateral movement is much easier than trying to alternate their mallets. That will come. Also, it is supposed to sound floaty!!!!

I was stuck for a bit on how to let them know when their improv. is through when I remembered an activity in Gameplan, where the student improvs to a flurry of feathers. When the feathers touch the ground their time is up. So magical. I am going to use this strategy tomorrow. You could also use a rainstick and have them improv until the rainstick sound has vanished. Or have students move as ghosts.

Here is my set up:

So, now the process:

  • Intro song by rote
  • Intro glockenspiel – member of the pitched percussion family because it has keys; light and delicate; how to hold the mallets and play in the centre of the keys; remember to bounce off the keys gently; play 2 notes at the same time;give it a go!!!!
  • Intro how to create the ghosty music with the feathers
  • put students in rows

Form – Sing the song ; teachers blows feathers; student improv. Sing the song

I have them move to the end of the row as we sing the sing so the next person is ready. The BX, played by the teacher, glues it all together. Here is the little Orff arrangement.

Remember to be patient. This is a first experience. Of course, I will be doing this song for the next 3 lessons. That’s how songs become our favorites!!!!

I hope you try this out. I am confident it will be a lovely way to start the week.

Have a Ghostly Good Time,

Take care,

Syndi

Wee sing…Inspired! Spooky Loo

As promised, day 2 of Wee sing Halloween inspired fun. Spooky Loo is a cutie pie Halloween version of Looby Loo. I am currently playing it with my K’s and 1’s. I could have sung it, but I decided it’s nice to do a little dance to a recorded version of the song. Here’s what I did:

Spooky Loo

  • Play the song as students enter. Model the following pattern for the verses : March March March March; Clap, Clap,Clap,Clap 
  • Ask for suggestions on a new movement for MARCH and CLAP (My students used these suggestion today: FOR MARCH – wiggle, run on the spot, and skip; FOR CLAP – squeeze hands, jump, and shake) Ask a student to chose their favorite. Perform with the music.

EASY PEASY

My next step – In a group of 4, create a movement for MARCH and CLAP. I want to introduce collaborating to my K’s and 1’s.

I hope you enjoy this little classic.

Take care,

Syndi

Wee Sing… Inspired! Spin Spider Spin

I have recently fallen in love with “Wee Sing – Halloween”. What a sweet compilation of children’s Halloween songs! It made me realize that in my never ending search for new resources, that sometimes I forget that quote “Look behind as well as before“. To clarify, “Wee Sing” is from when I was little!!!!! Over the next few days, I will share my Orffy take on a couple of the selections off of “Wee Sing – Halloween”

Spin Spider Spin.

What a haunting little minor tune. So simple. This is my plan for my littles:

  1. Read the story “The Very Busy Spider” by Eric Carle. I love this book, because the right side of the page shows how a spider builds a web and most copies are textured so you can feel the web as well.  At the end of every 2 pages, add the ostinato “Spin spider spin, Spin your spider web”
  2. Go back and take a look at how the spider built the web. Take note of the square outline of the fence the spider uses as a base. Lead the students to discover the spiral.
  3.  Our next step is to build our spider web using scarves. Designate an area that is the “fence” I use a square that is on my classroom floor. You can use ribbons or meter sticks…whatever works for you.  Have the students sit around the perimeter and give each a scarf. Touch one student at a time. They will add their scarf to the frame. Some will add the anchor lines they saw in the pictures and others will work on the spiral. All webs are beautiful so I try not to over manage this. Do a dry run then try it with the music playing. I remind them that spiders work silently. The song is short so play it on a loop so you don’t rush the beauty. Lovely.
  4. On another day, I am going to get them to make their spider web using a white crayon on a piece of black construction paper. Check it out below

Have a wonderful time spinning your webs.

Take care,

Syndi